Last Updated on July 10, 2020 by Larious
Windows is indeed a great desktop operating system. The operating system is powering the majority of desktop computers and laptops. If you have been using Windows operating system for a while, then you might know that there are lots of software available for the platform.
On average, a user installs almost 30-40 software on their computer. If you have limited internet bandwidth, then managing all those applications in your Windows system could be a real pain. Just like the operating system, applications also need updates, and they can consume lots of internet bandwidth.
Table of Contents
Limit Bandwidth to Certain Applications in Windows 10
Unless you are living in some high-tech city, most of the internet connections are of low bandwidth. So, if bandwidth is what restricting you to enjoy the internet fully, then you are reading the right article.
In this article, we are going to share a few best methods that would help you to limit bandwidth to certain applications in Windows 10. These methods would let you limit bandwidth to select applications in Windows 10.
Using NetBalancer
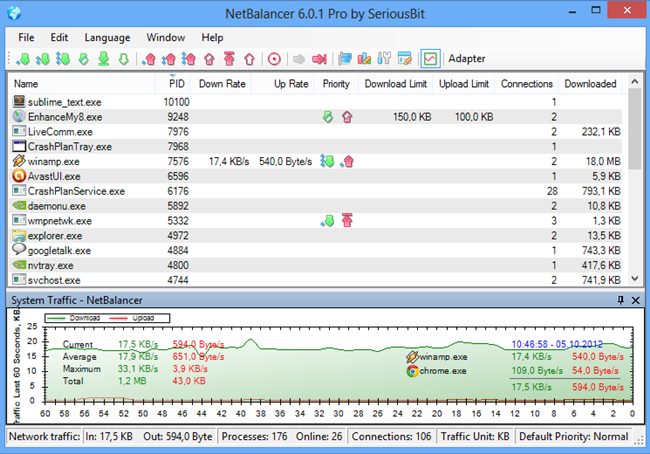
Here you will be using NetBalancer to manage bandwidth between an installed application on your Windows. With that, you can easily limit them to any of the apps to save your bandwidth.
Steps To Use NetBalancer to Limit Bandwidth to Certain Applications:
Step 1. First of all in your Windows 10 you need to download and install the cool application that is NetBalancer the tool that will allow you to manage your bandwidth between certain apps.
Step 2. Now firstly save all the work that you are doing over the internet as while installing this app the drivers will be installed that will stop internet connection. Now after completing the installation you need to restart your computer.
Step 3. Now after your computer is restarted launch the application from the created desktop shortcut and then click on Filter internet application and you will see all the application that working on the internet.

Step 4. Right-click on any of the application and select their priority according to your wish as low, medium or high according to your wish,


Step 5. You can also create custom rules for individual apps. Just select ‘Create Rule’ and set the new rules.


Now limit the data usage in KB’s for the apps that you want to restrict data usage.
That’s it, you are done! now the data limit will be set for that app.
Using NetLimiter
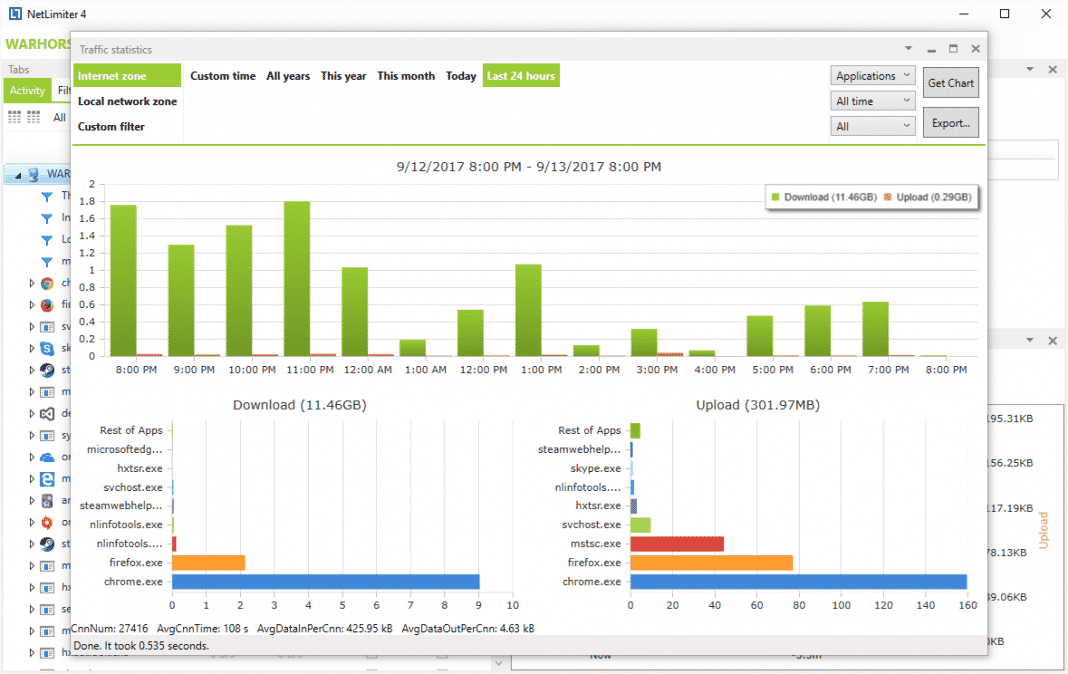
Well, NetLimiter is one of the best most advanced network management tools that you can use on your Windows 10 computer. The best thing about NetLimiter is that it allows users to set a certain bandwidth limit on apps. So, with NetLimiter, you can decide which apps can connect to the internet and how much they are allowed to use. Here’s how you can use NetLimiter on Windows 10 computer.
Step 1. First of all, visit this link to download & install NetLimiter on your Windows 10 computer. Once installed open the tool.
Step 2. Now, open the app and you will now see the main interface of the app. To check the exact download and upload speeds, click on the installed apps.


Step 3. To monitor internet traffic, you can double click on the app to view the traffic statistic.


Step 4. To set rules on NetLimiter, you need to select the app and then head to the Options > Add Rules.


Step 5. Now, if you want to set the traffic quota on any specific app, then select the app and then click on ‘Filter’ and then set the bandwidth quota.


That’s it, you are done! This is how you can use NetLimiter to limit Bandwidth to certain apps in Windows 10.
Alternatives
Well, just like the above tools, there are plenty of other bandwidth limiters available for Windows 10 computers. Almost every other tools work in a similar way where you need to pick software and set a limitation. Below, we are going to list down 3 best bandwidth limiters for Windows 10.
1. Glasswire


It is one of the leading and top-rated network monitor tools available for the Windows operating system. The great thing about GlassWire is that it allows users to monitor their bandwidth consumption and network activity by location, application. Not just that, but GlassWire also allows users to remotely monitor and block servers and IP addresses.
2. cFosSpeed


It is another best bandwidth limiter tool available for Windows 10 computers. The best thing about cFosSpeed is that its pretty lightweight and brings in lots of useful features. Although the app focuses on displaying the internet speed in real-time, it also allows users to configure their network traffic. The mini-tool allows users to limit bandwidth consumption per-app basis.
3. SoftPerfect Bandwidth Manager


Well, SoftPerfect Bandwidth Manager is another best Windows 10 bandwidth limiter software on the list which allows users to limit bandwidth usage on a per-app basis. The app brings in lots of features which makes the tool a little bit complicated. But it packs all necessary features that you expect from a network monitoring and management tool. SoftPerfect Bandwidth Manager allows users to create their own custom rules to limit bandwidth usage.
So above is all about How to Limit Bandwidth to Certain Applications in Windows 10. I hope this article helped you! Share it with your friends also.
